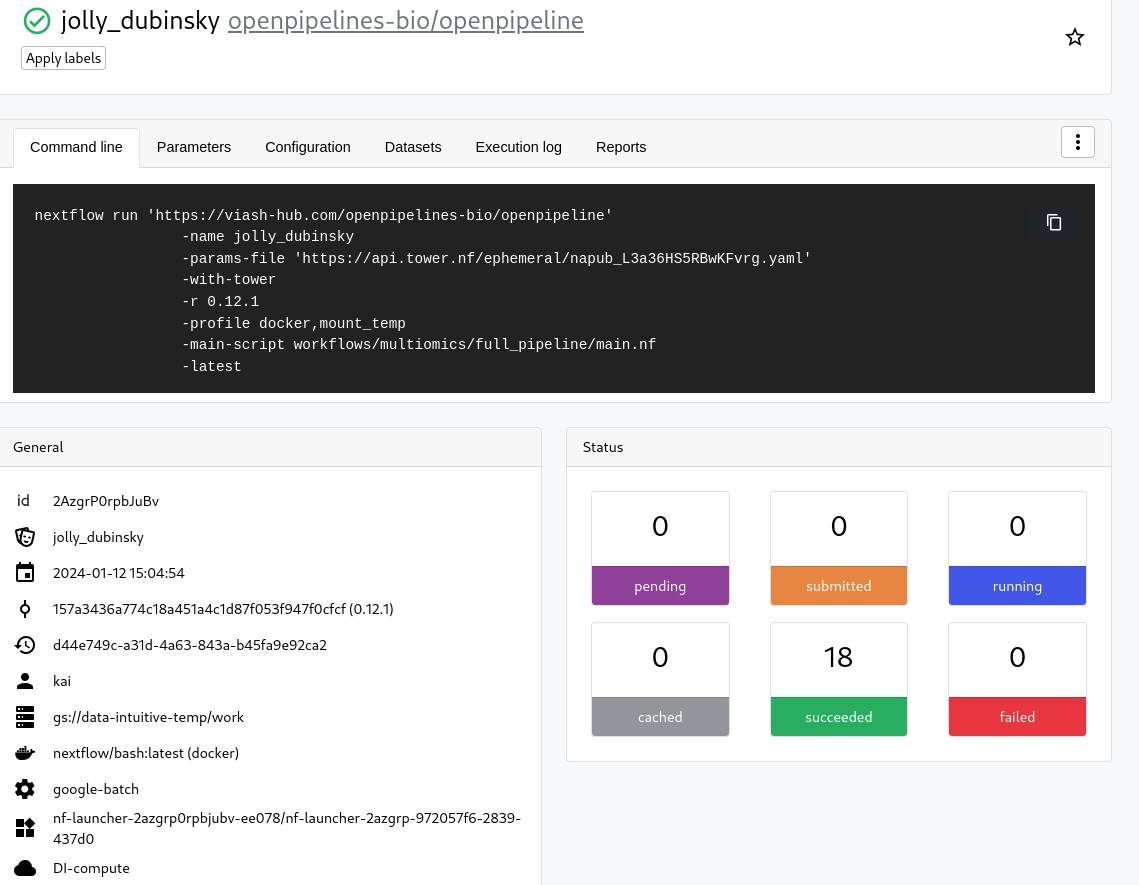
You can easily run the pipelines/workflows that are present in the opensource repo of Openpipeline. This can be done by using the Seqera Cloud (formerly known as nextflow tower or nf-tower) instance of Seqera Labs. This is a cloud based service that allows you to run nextflow pipelines in the cloud.
Below a picture of a succesfull run on the DI Seqera Cloud workspace:

Getting started
There are several ways to get started with Openpipeline and nf-tower:
- You can either start a pipeline through the CLI wether it is the nextflow CLI or the nf-tower CLI.
- You can also start a pipeline through the Seqera Cloud interface.
For this demo we will be using the nf-tower CLI. This is a command line interface that allows you to start a pipeline from the command line. This is a very powerful tool as it allows you to automate the running of pipelines. For example you can run a pipeline on a daily basis to analyse new data.
Requirements
Seqera Cloud
You need access to Seqera Cloud with a workspace and compute environment configured. For this demo we will be using the Data Intuitive workspace “Demo” and Google Batch as the compute environment.
Tower CLI
If this is the first installation, the following steps are required:
Install the CLI Tool according to nextflow Tower CLI
After Installing the cli tool, you will need to provide your nf-tower token.
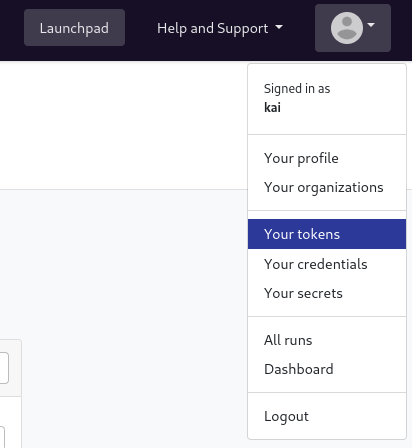
- Click on the user icon on the top right corner of the page and select the option Your tokens:

Click on the “Add Token” button and create a new Personal Access Token. Copy the token and save it in a safe place.
Add the token as a shell variable: directly to your terminal:
export TOWER_ACCESS_TOKEN=<your access token>
To run the analysis through seqera cloud you will also need the workspace and compute environment ID.
- workspace ID:
Click on the dropdown menu on the top right and select the organisation:

In the workspace tab you can find the ID below the workspace name in the list:

- Compute ID:
In the selected wokspace (same as above) go to the “Compute Environments” tab.
In the provided list you can find the ID below the status of the required environment:

- workspace ID:
Store the public data in a bucket for example on google cloud. For this demo we will be using the dataset 5k Human PBMCs, 3’ v3.1, Chromium Controller. The fastQ files are stored at
gs://<...>/openpipeline/resource_public/PBMC.
Run cellranger
The fastQ files are mapped using the cellranger pipeline from Openpipeline. To run the cellranger pipeline a reference is needed. The reference can be downloaded from the cellranger download page. For this demo we will be using the de reference stored at gs://<...>/openpipeline/reference/human/refdata-gex-GRCh38-2020-A.tar.gz. This is the same reference used by the 10x genomics analysis https://cf.10xgenomics.com/samples/cell-exp/7.0.1/SC3pv3_GEX_Human_PBMC/SC3pv3_GEX_Human_PBMC_web_summary.html.
Following code should be copied to a bash script:
#!/bin/bash

set -eo pipefail

cat > /tmp/params.yaml << HERE
param_list:
- id: "Chromium_3p_GEX_Human_PBMC"
  input: "gs://<...>/openpipeline/resource_public/PBMC"
  library_id:
    - "Chromium_3p_GEX_Human_PBMC"
  library_type:
    - "Gene Expression"

gex_reference: "gs://<...>/openpipeline/reference/human/refdata-gex-GRCh38-2020-A.tar.gz"
publish_dir: "gs://<...>/openpipeline/resource_public/PBMC/processed"
HERE

tw \
  launch https://viash-hub.com/openpipelines-bio/openpipeline \
  --revision 0.12.1 --pull-latest \
  --main-script target/nextflow/mapping/cellranger_multi/main.nf \
  --workspace ... \
  --compute-env ... \
  --profile docker,mount_temp \
  --params-file /tmp/params.yaml \
  --config src/workflows/utils/labels.config
Convert cellranger output
For the next step of the analysis we will need a “h5mu” data file. As this is not available from the cellranger output we will need to convert it to the correct format. We will be using the convert/from_cellranger_multi_to_h5mu pipeline.
In a bash script you will need to add the follow code:
#!/bin/bash

set -eo pipefail

OUT=gs://<...>/openpipeline/resource_public/PBMC

cat > /tmp/params.yaml << HERE
id: "Chromium_3p_GEX_Human_PBMC"
input: "$OUT/processed/Chromium_3p_GEX_Human_PBMC.cellranger_multi.output.output"
publish_dir: "$OUT/"
output: "Chromium_3p_GEX_Human_PBMC.h5mu"
HERE


tw launch https://viash-hub.com/openpipelines-bio/openpipeline \
  --revision 0.12.1 --pull-latest \
  --main-script target/nextflow/convert/from_cellranger_multi_to_h5mu/main.nf \
  --workspace ...  \
  --compute-env ... \
  --profile docker,mount_temp \
  --params-file /tmp/params.yaml \
  --config src/workflows/utils/labels.config
Run the analysis pipeline
Now that we have the “h5mu” data file we can analyse the pipeline with the multiomics/full_pipeline.
Add the following code to a bash file:
#!/bin/bash

set -eo pipefail

OUT=gs://<...>/openpipeline/resource_public/PBMC

cat > /tmp/params.yaml << HERE
id: "Chromium_3p_GEX_Human_PBMC"
input: "$OUT/Chromium_3p_GEX_Human_PBMC.h5mu"
publish_dir: "$OUT/"
output: "Chromium_3p_GEX_Human_PBMC_mms.h5mu"
HERE

tw launch https://viash-hub.com/openpipelines-bio/openpipeline \
  --revision 0.12.1 --pull-latest \
  --main-script workflows/multiomics/full_pipeline/main.nf \
  --workspace ... \
  --compute-env ... \
  --profile docker,mount_temp \
  --params-file /tmp/params.yaml \
  --config src/workflows/utils/labels.config
Caveats
It turns out that not all Google datacenter regions have all possible instance types. As a consequence, we ran into quota limits which could not be resolved.
In order to workaround this issue, we configured Nextflow to disable the use of those instance types. The following lines need to be adjusted in the config file:
src/workflows/utils/labels.config
  // Resource labels
  withLabel: singlecpu { cpus = 1 }
  withLabel: lowcpu { cpus = 4 }
  withLabel: midcpu { cpus = 10 }
  withLabel: highcpu { cpus = 20 }
src/workflows/utils/labels.config
  // Resource labels
  withLabel: singlecpu { cpus = 1 }
  withLabel: lowcpu { cpus = 4 }
  withLabel: midcpu {
    cpus = 10
    machineType = 'c2-*'
  }
  withLabel: highcpu {
    cpus = 20
    machineType = 'c2-*'
  }
